Steam Complete Pet - Unit is not steaming
This article contains all the steps necessary to fix steam issues with your mop.

CAUTION: When troubleshooting the Steam Complete, turn the unit off and allow it to cool for up to 30 Minutes
NOTE: Your Steam Complete Pet has two separate clean water tanks.
TIP: You should use distilled water or the correct Hoover cleaning solution for this product to ensure the best performance and reduce the chances of clogging the unit.
The unit is not Steaming
- First, let's make sure that your water tanks are filled to the indicated limits, properly closed and firmly placed in the unit.


- If your tanks are properly filled and placed in the unit yet no steam is generated, check that your water filter is both installed and clean.
- If your filter needs to be replaced, grip the sides of the filter to remove it then replace it with a new one. (Filters should be changed every 4-6 months)


- Lastly, if both tanks and filter are clear and properly installed check for clogs on your steam path. These connection point can get clogged due to dirt or buildup formula or debris overtime.
- Remove the nozzle head and the pads and clean any debris from the paths.


TIP: You can use something small like a paper clip to carefully poke the orifices where steam goes through.

TIP: If there is an obstruction to the steam flow through the machine, steam may release through the bleed valve.

NOTE: To produce steam, squeeze the trigger in short bursts. Don’t hold the trigger continuously to prevent over saturating floors.
The hand-held steamer is not Steaming
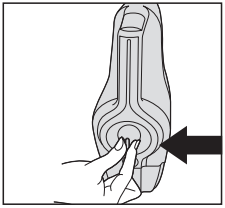
TIP: Adjust the dial on the front of the handheld to desired steam setting.
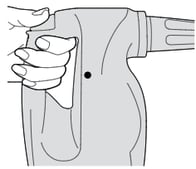
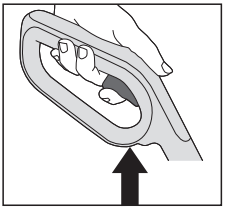
- First, lift the handheld release button and gently pull the handheld to release from the steam cleaner. To produce steam, push the trigger with your thumb in short bursts. Don’t hold the trigger continuously to prevent over wetting


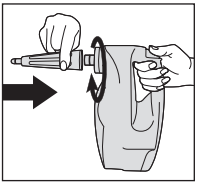
- When using the handheld steamer always attach the concentration nozzle or hose. Push onto the handheld nozzle and twist clockwise to lock into position.


NOTE: Small tools can be attached via concentration nozzle. Twist clockwise until locked into position and secure. To remove concentration nozzle, turn counterclockwise.

NOTE: Larger accessories can be attached using the concentration nozzle or hose. To attach the hose twist clockwise until locked into position and secure. To remove hose, turn counterclockwise.
NOTE: If you have tried to troubleshoot and need to fill a warranty claim, please visit our Warranty Information page for more information on how to do so.